
Yes, I’m talking about the much dreaded “L – Word.” Lippage. A word rarely spoken of or given much thought. Until…issues arise. A simple, innocuous comment during a final walkthrough could land you in punch list purgatory – with no way out. Want to avoid lippage? Read on. I’m here to help. I’ll share with you my top 5 tips to minimize lippage from early design to final closeout.
Now…before we jump in, what is lippage? I mean, we know what lippage is, but how is it defined in a technical sense? The definition is actually quite lucid and straightforward. It is simply the vertical displacement between two adjacent tiles – that’s it. However, defining it and understanding it are two very different things. Tile lippage can result from a singular factor or the combination of many factors. We’ll get down to the details shortly, but lippage isn’t about eliminating or controlling one aspect of the system. Early design, installation practices, and understanding the inherent physical characteristics of tile are all prerequisites to fully understanding lippage. Let’s touch briefly on the topic of physical characteristics. By the very nature of the way it is produced, tile has an inherent crown in the middle. This is its highest point when laid down flat. The curvature of the tile, which can be concave or convex, is a natural characteristic and should be expected with all “kiln-fired” clay products. This is attributable to the changes that occur during the firing and cooling process of production. We’ll discuss this in greater detail as we continue, but this is very important to know as you specify on your next project. Now without further ado, here are my
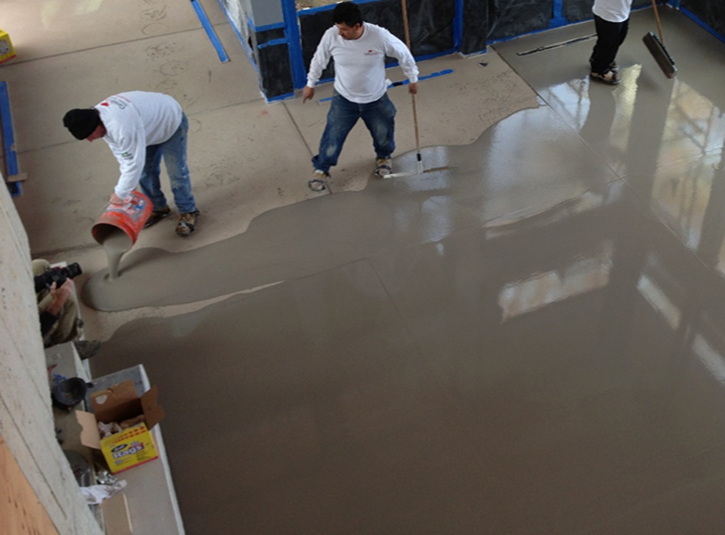
This could be, arguably, the most important step in the installation. An uneven substrate or subfloor directly telepaths to an uneven floor finish, which directly results in areas of unwanted slippage. Chipping, grinding out high points, filling, and leveling out low points are just as important as the final installation. For filling in low points, cementitious self-leveling agents or patching compounds help to smooth, flatten, and level out the substrate. Remember, any tile larger than 15” on any one side requires a substrate flatness to vary no more than 1/8” in 10’-0”. Proper floor prep is the foundation of any successful installation and should not be overlooked. More information about acceptable variations may be found in the TCNA FAQs about lippage.
Believe it or not, there really is a science to specify the joint size properly. It can get a little confusing, and once offset patterns are introduced, you’ll need to dust off that graphing calculator from college to make sense of it all. Good news! I’ve simplified matters. Let’s take a standard 12” x 24” pressed porcelain floor tile. Within the same carton, individual pieces can vary up to a maximum of 1/16” in size. Take this maximum variance and multiply by 3. That is the size of your grout joint. In this example, it is 3/16”. This is important because forcing a smaller grout joint beyond the dimensional tolerance will only result in uneven spacing and ultimately lead to lippage. Find further details about determining grout joints on this TCNA page. Always remember that tile manufacturers have their own internal standards, so always follow their guidance and recommendations, as they are the best resource.
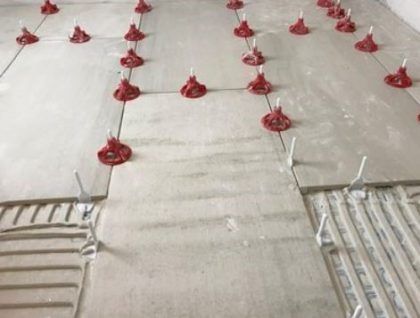
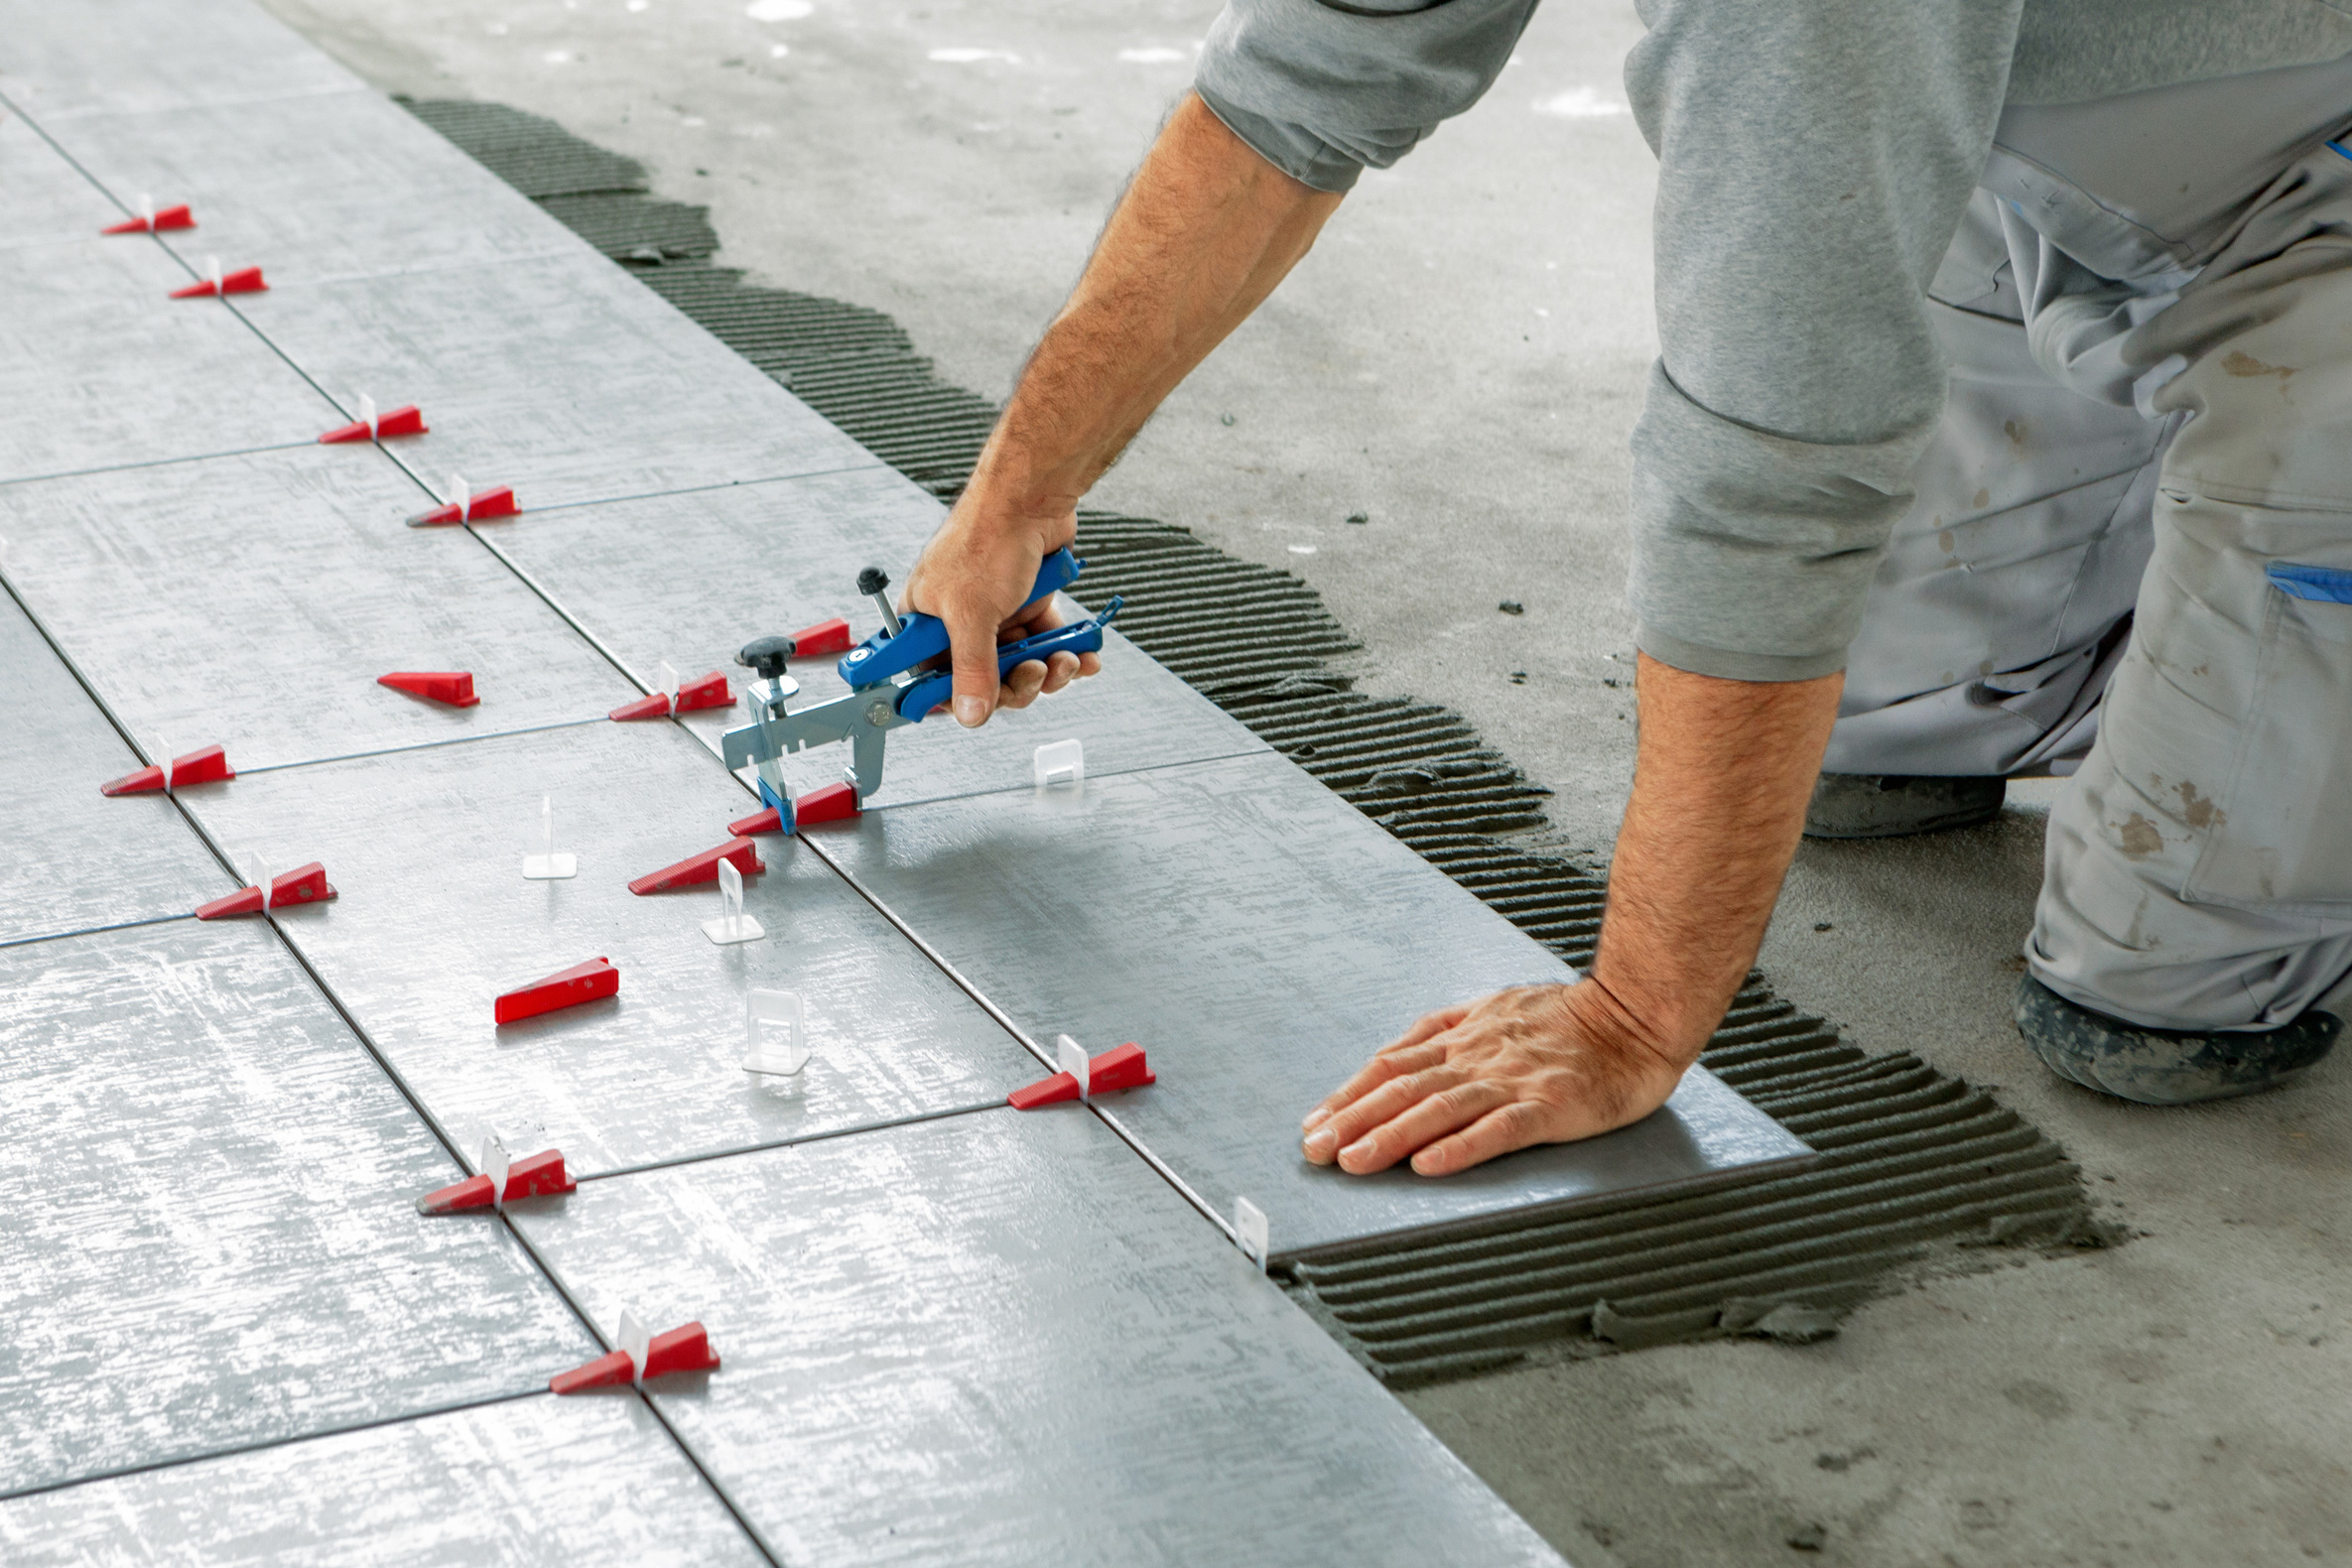
As tiles increase in size and facial surface, so does the potential for lippage. These mechanical leveling systems serve as both grout spacers and leveling clips. Traditional grout spacers fall short because they are not used to “true” or “level” adjacent tiles; they merely provide consistent joint spacing. Consider specifying lippage control systems for large-format, thin-gauged, and plank-style tiles.
I touched on this a little earlier. Tiles are manufactured products composed of clays, feldspar, sand, and other natural elements. The natural crown near the tile’s center is an inherent characteristic of “fired” ceramic products. Naturally, the tile curves down towards the edges and the corners. This is why ceramic tiles are not perfectly flat. The most sophisticated manufacturing processes and the strictest quality control measures still cannot yield a perfectly flat tile. It is with this understanding that proper offsets can be specified. Any tile larger than 18” on any one side cannot be offset more than 33%. Any higher percentage will directly result in lippage issues. Why? Because you are essentially marrying the lowest part of one tile to the highest part of the adjacent tile. In addition, offsets require that the grout joints be opened slightly to hide the elevational differences further. Personally speaking, I have seen and visited countless projects where workmanship was of the highest quality, but due to the inherent flaws in the design scheme, the floors didn’t have a fighting chance.
This allows for a more detailed and comprehensive warranty of the entire floor system. In addition to proper specs and appropriate labor, lippage is also affected by proper setting materials. For instance, a large and heavy floor tile must be installed using large and heavy floor tile mortar. Using mortar not specifically designed for this application risks compromising the structural integrity of the setting bed and possibly the curing process. Inconsistent curing is one of the major culprits in shrinkage and a major contributor to lippage. Stick to single sourcing, as this will confirm the appropriateness of materials through the manufacturer, and they can provide proper guidance on their unique and proprietary products. In most cases, the standard performance warranty is extended to greater lengths, all because the system is through a single manufacturer. Creative Materials partners with Mapei and Laticrete, offering an excellent array of setting materials.

No one wants lippage. Not only are the aesthetics undesired, but excessive lippage can lead to performance issues. It is not uncommon to find damage at edges and corners when objects slide and bump up against these areas. In addition, trip-and-fall incidents are always greater with an uneven floor finish. As mentioned earlier, tile lippage is typically a combination of inadequate substrate prep, inferior installation techniques, and improper material and design specs. Believe it or not, the best way to combat lippage is during the design phase. Taking a proactive and thoughtful approach to building a detailed and appropriate tile specification will help eliminate many unwanted surprises. This degree of control allows the specifier to better drive the desired results with increased assurance and clear direction.
Contact any member of Creative Materials’ Quality Assurance and Technical team, as we offer complimentary specification review. Feel free to download our 3-Part Specification Guideline.
Until next time,
Ken